24 Jul, '24
Ultimate Guide to Wood Floor Repairs: Tips and Techniques
Wood floor maintenance is essential for preserving the beauty and longevity of your flooring. Regular upkeep, such as sweeping and vacuuming to remove dirt and debris, along with periodic cleaning using products designed specifically for wood floors, helps to prevent surface damage and wear. Timely repairs are equally crucial, as addressing issues like scratches, gaps, and water damage promptly can prevent more extensive damage and costly fixes in the future. Consistent maintenance and quick intervention not only enhance the aesthetic appeal of your wood floors but also extend their lifespan, ensuring they remain a valuable feature of your home for years to come.
Understanding Wood Floor Types
Solid Wood Flooring - crafted from single pieces of timber, offering unmatched durability and a classic aesthetic. These floors can be sanded and refinished multiple times, making them a long-lasting option. However, they are more sensitive to moisture and temperature changes, which can lead to warping or gaps over time.
Engineered wood flooring - consists of a top layer of real wood veneer adhered to several layers of plywood or high-density fiberboard. This construction provides better stability and resistance to moisture compared to solid wood. Engineered wood can be a versatile choice, suitable for areas with fluctuating humidity levels, such as basements and kitchens.
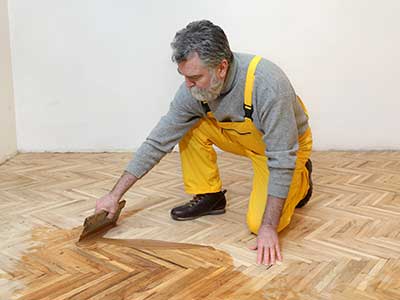
Parquet flooring - made up of small wood blocks arranged in intricate patterns, such as herringbone or chevron. This type of flooring offers a unique and decorative appearance, adding an element of art to any space. While parquet floors are visually striking, they require meticulous installation and maintenance to keep their patterns looking pristine.
Common Wood Floor Issues
 Scratches and Surface Damage: Over time, wood floors can accumulate scratches from foot traffic, pets, and moving furniture. Surface damage can range from minor scuffs to deeper gouges that affect the appearance and integrity of the flooring.
Gaps Between Floorboards: Seasonal changes and fluctuating humidity levels can cause wood floorboards to expand and contract, leading to gaps between them. These gaps not only affect the aesthetics but can also create tripping hazards and allow dirt and debris to accumulate.
Loose or creaking floorboards: Often a result of improper installation, age, or changes in the subfloor. This issue can be both annoying and indicative of underlying problems that need addressing to maintain the floor's stability and longevity.
Water Damage: Exposure to moisture can lead to warping, cupping, and staining of wood floors. Water damage is often caused by spills, leaks, or high humidity levels and can significantly impact the floor's appearance and structural integrity if not addressed promptly.
Stains and Discoloration: Wood floors can become stained or discoloured due to spills, pet accidents, or prolonged exposure to sunlight. These stains can penetrate the wood and become difficult to remove, affecting the overall look of the flooring.
Tools and Materials Needed
Essential Tools
- Hammer: For removing nails or tapping boards into place.
- Chisel: Useful for removing damaged wood and clearing out old filler.
- Putty Knife: For applying wood filler and smoothing it out.
- Sandpaper (various grits): Necessary for sanding down repairs and refinishing the floor.
- Wood Filler: To fill in gaps, scratches, and gouges.
- Stain/Finish: To match repaired areas to the rest of the floor and protect the wood.
Optional Tools
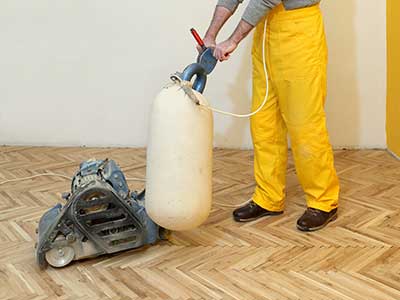
- Drum Sander: For sanding large areas, especially useful in refinishing projects.
- Edge Sander: To reach edges and corners that a drum sander cannot.
- Nail Punch: For countersinking nails to prevent them from damaging the sandpaper.
- Floor Buffer/Polisher: To give the floor a polished, finished look after repairs and refinishing.
Fixing Surface Level Damage
Before beginning any repair, it’s crucial to assess the extent of the damage on your wood floor. Minor surface scratches and small gouges are typically visible to the naked eye, but deeper scratches might require closer inspection. Run your hand over the surface to feel for rough areas or indentations.
Steps to Fix Minor and Deep Scratches
-
Minor Scratches:
- Clean the Area: Start by thoroughly cleaning the scratched area to remove any dirt or debris.
- Buff Out Scratches: Use a floor polisher to gently buff out the small scratches.
- Touch-Up Marker: Apply a touch-up marker that matches your floor colour to the scratch and blend it with the surrounding wood.
- Buff Again: Buff the area again to ensure a smooth finish.
-
Deeper Scratches:
- Sand the Area: Lightly sand the scratched area with fine-grit sandpaper until the scratch is less visible.
- Apply Wood Filler: Fill the scratch with a matching wood filler, making sure it is level with the surface.
- Sand Smooth: Once the filler is dry, sand the area smoothly with fine-grit sandpaper.
- Refinish: Apply a matching stain and finish to blend the repair with the rest of the floor.
Repairing Small Gouges
- Clean the Gouge: Ensure the gouge is free of dirt and debris.
- Fill with Wood Filler: Use a putty knife to fill the gouge with wood filler, making it level with the floor surface.
- Sand Smooth: Once the filler has dried, sand the area smoothly with a fine-grit sandpaper.
- Stain and Finish: Apply a matching stain and finish to the repaired area to blend it seamlessly with the rest of the floor.
Repairing Water Damage
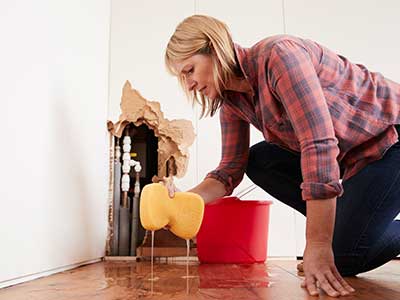 Identifying Signs of Water Damage: Water damage can manifest in several ways, including warping, discolouration, and mould growth. Look for areas where the wood appears to be swollen, has changed colour, or feels spongy underfoot. Also, inspect for any signs of mould, which often appear as black or green spots on the wood surface.
Drying the Area Thoroughly: Before any repairs can be made, it is essential to dry the affected area completely to prevent further damage. Use fans, dehumidifiers, and, if necessary, a wet/dry vacuum to remove any standing water and moisture. Ensure the area is thoroughly dried before proceeding with repairs to avoid trapping moisture under new layers of finish.
Sanding and Refinishing Minor Damage
- Lightly Sand the Area: For minor water damage, lightly sand the affected area using fine-grit sandpaper to remove the damaged finish and smooth out any warped sections.
- Clean the Surface: After sanding, clean the area thoroughly to remove any dust and debris.
- Apply Stain and Finish: Apply a matching stain to the sanded area, followed by a protective finish to seal the wood and restore its appearance.
Replacing Severely Damaged Boards
- Remove Damaged Boards: If the water damage is extensive, the affected boards will need to be replaced. Carefully remove the damaged boards using a chisel and hammer.
- Prepare the Subfloor: Ensure the subfloor is dry and in good condition before installing new boards.
- Install New Boards: Cut new boards to fit the removed sections and install them, ensuring they match the existing floor in type and finish.
- Sand and Finish: Sand the newly installed boards to blend them with the surrounding floor, then apply stain and finish to achieve a uniform look.
Properly addressing water damage not only restores the appearance of your wood floor but also prevents long-term issues such as mould growth and structural instability.
Refinishing and Polishing
Refinishing your wood floor becomes necessary when it shows signs of extensive wear, such as deep scratches, dullness, or significant discolouration. If your floor has lost its lustre and regular cleaning no longerores its appearance, it might be time for a full refinish.
Additionally, if the protective finish has worn away, leaving the wood exposed and vulnerable to damage, refinishing is essential to protect and revitalise the floor.
Steps to Refinish: Sanding, Staining, and Sealing
 1. Sanding the Floor
- Preparation: Clear the room of all furniture and cover vents and doorways to contain dust. Inspect the floor for any nails or staples that need to be removed or countersunk.
- Initial Sanding: Use a drum sander with coarse-grit sandpaper (36-40 grit) to remove the old finish and any surface imperfections. Move the sander along the grain of the wood to avoid damaging the floor.
- Progressive Sanding: Switch to medium-grit sandpaper (60-80 grit) and sand the entire floor again to smooth out scratches from the initial sanding. Finish with fine-grit sandpaper (100-120 grit) to achieve a smooth, even surface.
- Edge Sanding: Use an edge sander to reach corners and edges where the drum sander can't. Follow the same progression of sandpaper grits.
2. Staining the Floor (Optional)
- Choosing a Stain: Select a wood stain that matches your desired colour and enhances the natural grain of the wood. Test the stain on a small, inconspicuous area to ensure satisfaction with the colour.
- Application: Apply the stain evenly using a clean cloth or a staining pad. Work in small sections and wipe off any excess stains to avoid blotches. Allow the stain to dry according to the manufacturer's instructions.
3. Sealing the Floor
- Selecting a Finish: Choose a high-quality polyurethane finish, available in water-based or oil-based formulas. Water-based finishes dry faster and have less odour, while oil-based finishes offer a richer colour and increased durability.
- Application: Apply the finish using a brush or roller, working with the grain of the wood. Apply thin, even coats to avoid bubbles and streaks. Allow each coat to dry thoroughly before applying the next one. Typically, two to three coats are recommended for optimal protection.
- Buffing Between Coats: Lightly buff the floor with fine-grit sandpaper or a floor buffer between coats to ensure a smooth, even finish. Clean the floor thoroughly after buffing to remove all dust and debris.
Refinishing your wood floor not only enhances its appearance but also extends its lifespan by protecting it from wear and damage. Properly refinished floors can transform the look of your space and provide a durable, beautiful surface for years to come.
When to Call a Professional
While many wood floor issues can be addressed with DIY methods, certain situations warrant the expertise of a professional. Here are some signs that indicate it's time to call in a professional:
- Extensive Water Damage: If your floor has been significantly affected by water, leading to widespread warping, mould, or rot, professional intervention is necessary. These issues often require advanced techniques and equipment to properly address.
- Large Areas of Warping or Buckling: Minor warping can sometimes be fixed at home, but extensive warping, buckling, or cupping affecting large sections of your floor needs professional assessment and repair.
- Deep Gouges and Severe Scratches: While small scratches and gouges can be managed with DIY methods, deep or widespread damage might require professional sanding and refinishing to restore the floor’s appearance and integrity.
- Structural Issues: If your wood floor is experiencing structural problems, such as sagging or severe instability, this could indicate issues with the subfloor or the floor's support structure. Professional evaluation and repair are essential to ensure safety and proper restoration.
- Complex Repairs: Intricate parquet patterns, specialized finishes, or historical wood floors often require the skill and knowledge of experienced professionals to maintain their unique characteristics and value.
Tips for Finding a Reliable Contractor
When seeking a professional contractor to repair your wood floors, consider the following tips to ensure you hire a qualified and reliable expert:
- Research and Reviews: Look for contractors with strong reviews and testimonials. Online platforms, such as Yelp, Google Reviews, and the Better Business Bureau, can provide valuable insights into a contractor’s reputation and quality of work.
- Experience and Expertise: Choose contractors with extensive experience in wood floor repairs and refinishing. Specialized knowledge in handling different types of wood and specific repair techniques is crucial.
- Ask for Recommendations: Word of mouth is a powerful tool. Ask friends, family, or neighbours who have had similar work done for their recommendations.
- Check Credentials: Verify that the contractor is licensed, insured, and bonded. This ensures that they meet industry standards and you are protected in case of accidents or damages.
- Request Quotes: Obtain detailed quotes from multiple contractors to compare prices and services. Ensure the quotes include all aspects of the job, such as materials, labour, and any additional fees.
- Portfolio and References: Ask to see a portfolio of the contractor’s previous work. Additionally, request references from past clients to gauge their satisfaction and the contractor's reliability.
- Clear Communication: Choose a contractor who communicates clearly and promptly. They should be willing to answer your questions, explain the repair process, and provide regular updates throughout the project.
By identifying when professional help is necessary and knowing how to find a reputable contractor, you can ensure your wood floor repairs are handled efficiently and to a high standard, preserving the beauty and functionality of your floors for years to come.